The Ultimate Beginners Guide to Cake Decorating Part II: Chocolate Shard Cake
I am really excited about part II of The Ultimate Beginners Guide to Cake Decorating. We are going to build on everything we have learned so far from part I to decorate a cake using chocolate shards. Chocolate shards sound so fancy but they are so easy, you are going to want to use it all the time. The possibilities are endless with this design from plain to multi-color, sprinkles etc. Bonus… there is no need to have a perfectly smooth frosting, the chocolate shards will hide all the flaws. Who doesn’t want that right? If you are rusty on your frosting techniques try my favorite method using two cake boards with ganache and buttercream.
How to Make a Chocolate Shard Cake
Chocolate shards can be made with regular chocolate, but we are going to use candy melts instead. Because regular chocolate needs to be tempered and the candy melts are usually ready to go. To make the cake interesting use multiple colors. For this design, we are using two colors. Now I hope you are as excited as I am about making this cake. Let’s talk about what you are going to need.

This page may contain affiliate links which mean that if you make a purchase from any links directed from this website I may earn a small commission. I only recommend things that I use and love and the classes I have taken. Thank you very much for your ongoing support.
Ingredients
- Candy melts (pink candy melt and white candy melt)
- Sprinkles (optional)
- 6-inch cake frosted (don’t worry if it’s not smooth)
- About 2-3 cups buttercream colored light pink (here are a few buttercream recipes to choose from)
- Parchment paper
- Small piping bag
- Ruler
- pencil
- Ribbon (I buy all my ribbons at Joann’s)
- Measuring tape


Steps for making Chocolate Shard Cake
Making the Chocolate Shard
- The first thing in making the chocolate shards is to measure around the cake. Get the circumference chart here. This determines how long to make your parchment paper.
- Once you have the length of your cake, cut a piece of parchment paper, make it a little bit longer than you need.
- Measure the height of the cake, plus a 1/2 inch to make it taller than your cake. Then use a ruler to measure and mark the height using a pencil. Go a little bit longer so that you can see your lines. Flip it over or else the pencil mark will come off with the chocolate shard (don’t ask me how I know that).
- Melt some white candy melt in a small piping bag in 30-second intervals. Then add zig-zag design.
- Then melt the pink candy melts in 30-second intervals and add on top of the white.
- Spread with an offset spatula. Don’t worry if it is not smooth.
- Let it sit for a few minutes (not too long) use a knife and cut a straight edge all around.
- The follow the lines and cut rectangles. Let it sit until it is completely set.
- Then remove from parchment paper.


Decorating the Cake with the Chocolate Shard
- Get your frosted cake with the not so perfect frosting and place on final board.
- Place some buttercream liberally to each shard
- Place on the cake beginning in the front.
- Overlap each shard like this
- Keep adding overlapping each time. Press into the cake to adhere.
- Keep overlapping until you have covered the entire cake.
- Now it is time to create the rosettes on top of the cake. To create a rosette hold your piping bag at a 90-degree angle and in begin squeezing while going in a circular motion. You’re creating a ‘C’. Keep overlapping until you get to the end. Pipe small flowers to fill in the spots. If your rosettes didn’t go all the way to the top (mine didn’t) clean off the top of the chocolate shard. Another option is to cut them shorter.
- It should look like this. Then add some edible pearls to the top. Now you have a finished cake that looks like a professional made it.
- Congratulations on your cake.


If you are decorating along with us tag me on Instagram #wowisthatreallyediblecakedecorating. Come back next week to learn how to decorate a beautiful black drip cake. You don’t want to miss it.
As always don’t forget to share the love. Until next time happy cake decorating.

Related Posts
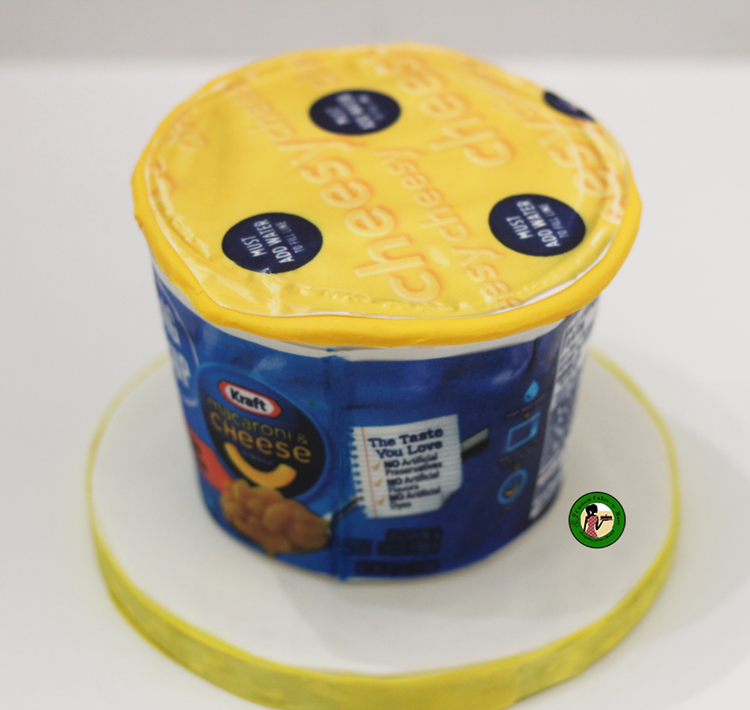
How to Make a Macaroni and Cheese Cake
This week I am switching things up a bit. Today I have a tutorial on
January 24, 2020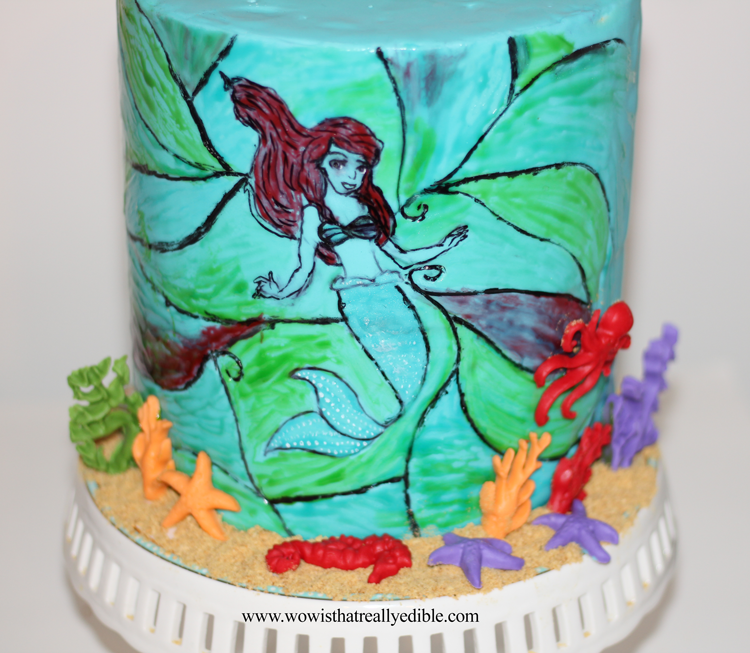
How to Make Stained Glass Cake
A stained glass cake is such a timeless and beautiful design. I was so excited
March 8, 2019