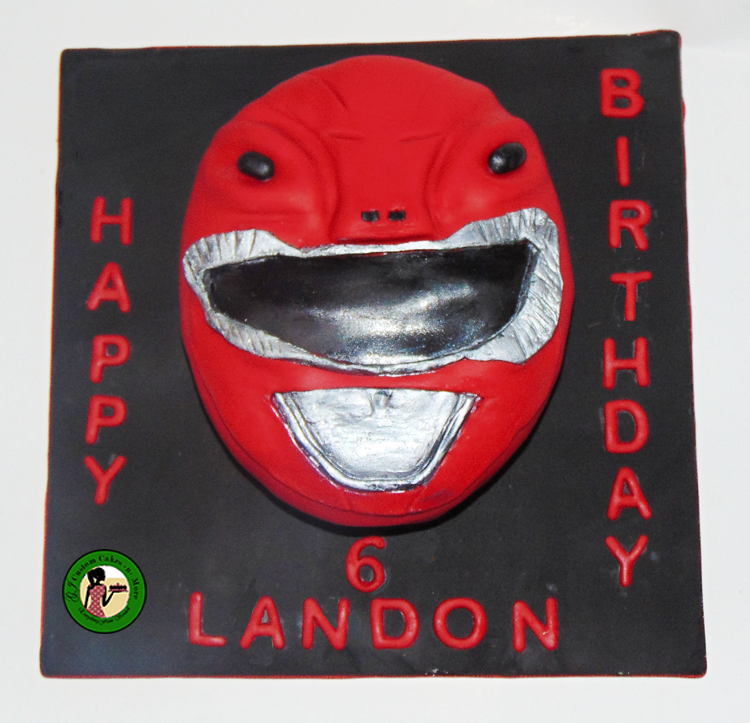
Power Ranger Cake: Red Ranger
My nephew celebrated his 6th birthday a few weeks ago and asked for a Power Ranger Cake. Originally he wanted a Black Panther cake and I had started planning for that. I was so ready to make the Black Panther cake especially after seeing it in the movies and a few times on DVD. Then like any kid, he changed his mind (so bummed). So… I had to dig deep for this Power Ranger Cake. I haven’t seen the Power Rangers since the 90’s when it was the Mighty Morphin Power Ranger. But, since I am his favorite aunt, I couldn’t disappoint my nephew.
This was an easy cake to make but it was difficult to get pictures to use for templates. Eventually, I found a photo online that I shrunk to fit the size of the cake. I used the photo below to carve the cake. The cake was very easy to make and required very little carving. 
The cake is a red velvet cake filled with cream cheese frosting and frosted with a vanilla Italian Meringue Buttercream.
This page may contain affiliate links which mean that if you make a purchase from any links directed from this website I may earn a small commission. I only recommend things that I use and love and classes I have taken. Thank you very much for your ongoing support.
Materials Used for the Power Ranger Cake:
- Fondant (red and black), you can make your own homemade Marshmallow fondant
- Square cake board (8 inches)
- Square cake base
- Edible silver luster dust
- Wilton letter cutter
- Gumpaste veining/Dresden tool
- Paintbrush
- 10-inch cake pans
Step 1: Carving the cake
I printed and trimmed the template to the right size. I baked 2 10-inch cake and kept the dome on one of the cakes. Then I placed the template on the cake and carved with a paring knife (holding the knife at a 90-degree angle). I carved around the template and took off the excess. I did this for both cakes. If you are a little nervous doing it this way, place both cakes together and carve all the layers at once. This will make sure all layers are the same size. Then I carved the sharp edges around the cake,
Once this was done, I filled the cake with the cream cheese frosting and placed it in the refrigerator to chill. For the cream cheese recipe that I used, see my buttercream guide here.
Step 2: Cut out and shape the fondant for the 3D Effect
I used the template to cut out the top of the head and made small fondant sausages for the eyes using some red fondant. It does not matter what color fondant is used here because it will be covered with the final piece of fondant.
Using some black fondant I cut out the area for the glasses (at least that’s what I call it). I also cut out the lip portion.
The Red Ranger is a T-Rex. To achieve the 3D effect, using the template as a guide, I placed the strip of red fondant in the middle of the face and the sausages around the eye area. Then I added the glasses that I made from the black fondant and the mouth area. I wanted to make the cake look as close as possible to the picture. Also, hoping that my client (nephew) would be happy with his final cake. If I messed this up he would know immediately. This is a lot of pressure…
I was super excited at this point and in my zealousness, I went ahead and painted the lip area silver. If you are going to do this make sure it’s dry before adding the final red fondant.
Add Fondant and Shape the eyes, the forehead, and the mouth.
I rolled out some red fondant to the size of the cake adding at least 2 inches on each side and laid it on top of the cake. With my hands, I shaped the eyes, the section in the front and the area around the glasses and mouth. I secured the fondant to the side of the cake using a fondant smoother and cut off the excess. If you would like to know how to cover a cake in fondant see how to here.


Then I used a veining tool to bring out the shape of the eyes and around the top. Using a scalpel I cut out the area for the glasses and the mouth, but you can use a Xacto knife. The knife should be very sharp. At this point, I had to paint the mouth silver again.
The last thing for this Power Ranger cake is the silver glasses frame
I rolled out a piece of black fondant very thick and using the template I cut out the glasses frame. Then I painted the frame silver. I realized after I added the frame that the area around the mouth did not have the 3D effect I wanted. Therefore, I added another layer of fondant to fix this. In hindsight, I should have placed some fondant pieces in this area.

I was finally finished with the cake. I trimmed the board around the cake using a scalpel and added the cake to the final board using some ganache. The final board was made out of 1/2 inch foam core board because I did not have a 10-inch cake base, then covered with black fondant. I cut out the letters using my Wilton letter cutter then added them to the board with some shortening.
My nephew was very happy with his Power Rangers Cake and Power Rangers Cake pops. Another happy customer.
Related Posts
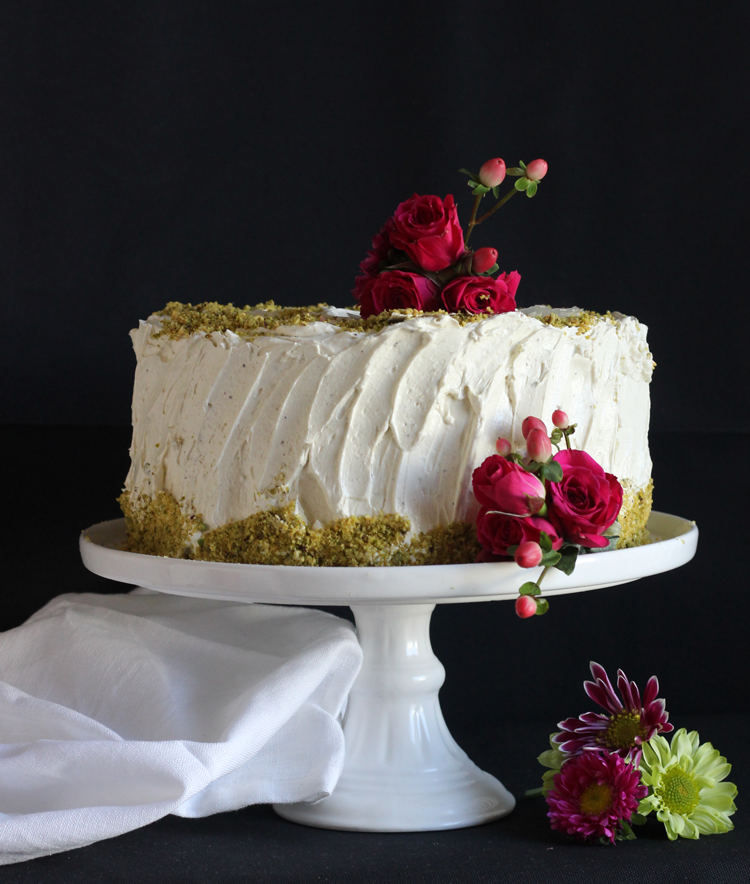
The Best Pistachio Cake from Scratch with Pistachio Buttercream
Do you like pistachio ice cream? I do, it’s one of my favorite flavors. That’s
April 2, 2021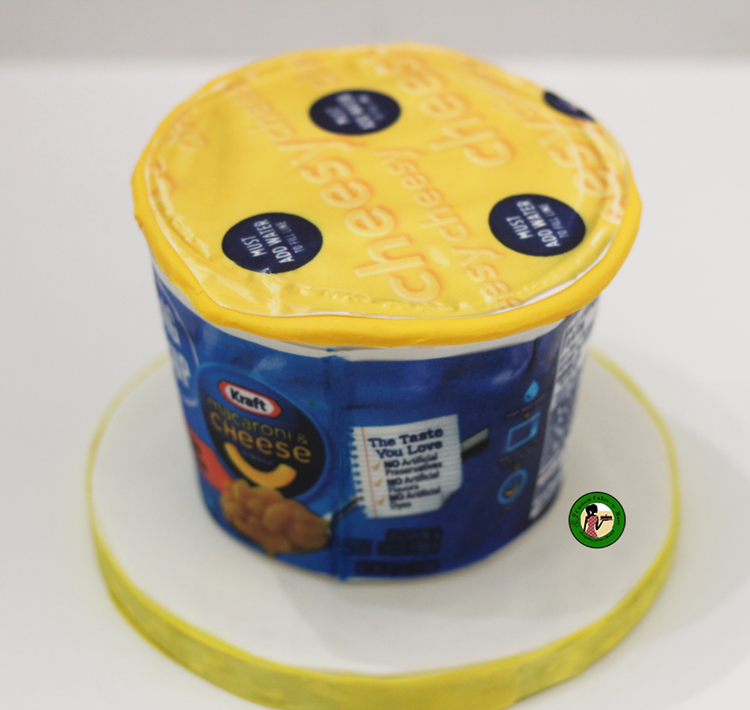
How to Make a Macaroni and Cheese Cake
This week I am switching things up a bit. Today I have a tutorial on
January 24, 2020