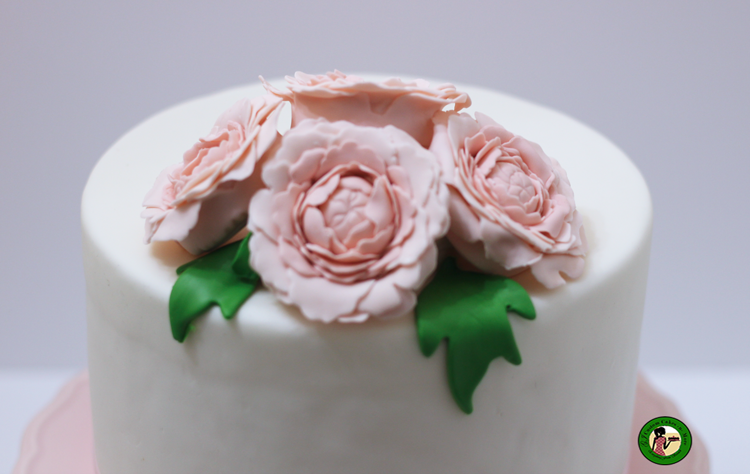
How to Make a Quick and Easy Gumpaste Peony

Making gumpaste flowers takes time and patience. I mean LOTS of time. Peonies are my absolute favorite. But a normal gumpaste peony can take upwards of forty petals. However, sometimes when decorating cakes you are short on time. So, I am always looking for easier ways to make sugar designs without sacrificing the look. Today I am going to show you how to make an easy gumpaste peony. It is so easy even a beginner can make it.
How to Make an Easy Gumpaste Peony
As I said before I am obsessed with peonies and last year attempted to plant them in my garden. Let’s just say I should stick with cake decorating because none of my peony buds came up and I planted six of them. So I am sticking with what I do best. Now for the peony.
The tool that use to make gumpaste peony is a cutter from FMM sugarcraft. Of course there are tons of cutters on the market, but I really like this one. It makes the job so much easier and looks amazing. I must admit the first time I tried the cutter I didn’t love my flowers, however with a little practice I was very happy with the results.

This page may contain affiliate links which means that I may earn a small commission if you purchase from any links directed from this website. I only recommend things that I use and the classes I have taken. Wowisthatreallyedible is a participant in the Amazon Services Associate Program. As an affiliate of Amazon, we place custom links in blog posts (such as this one). Thank you very much for your ongoing support.
Materials Needed:
- Cake covered with fondant (see tutorial how to cover a cake with fondant)
- Gumpaste
- Pink gel color
- FMM peony cutter
- Fondant ball tool (optional)
- Small rolling pin
- CelPad/Fondant shaping foam
- Small Mat
- Corn starch
- Vegetable Shortening
- Cupcake liners
Step by Step
Step 1: Color the Gum paste
Color a batch of gum paste in a darker pink, use the darker pink to color the white gum paste to get a lighter color.
Step 2: Making the Ball
Roll a piece of the darker gum paste into a small ball. Measure the size using the small cutter.

Roll the ball so the top is larger than the bottom. Then use the cutter to make marks on the top of the ball.

Step 3: Making the Petals
Roll out the darker gum paste to about 1/16th inch thick. Not too thin that you can see through the board.

Cut out two small sizes and two larger sizes.

Let the petals sit for about five minutes to firm up.
Step 4: Thin the edges of the petals
Place the gumpaste on the CelPad. Then use a ball tool or the small roller and thin the edges of the petals. Make sure the ball tool is half on the petal and half on the CelPad.

Run the ball tool from the top of the petal to the bottom to cup each petal. Then flip it over and do the same on the opposite side.

Place some glue on the inside of the top flower petals and fold in a straight line, press down a bit.

Step 5: Putting the Flowers Together
Add some glue on the first set of small petals and add to the gumpaste ball.

Then add some more glue and add the second row with the small petals. Continue with the larger petals.

The last petal will flop around a bit. Add to the entire flower to a cupcake liner of a flower former. Pull down the liner for a larger flower.

That’s it an easy gumpaste peony. If you love this tutorial don’t forget to share the love and pin for later.
Stay tuned for the next tutorial on a large open peony.

