How to make a Horizontal Fondant Ruffle Cake
Today I am sharing with you how to make an easy horizontal fondant ruffle cake. I know easy and ruffle should not be in the same sentence. Plus, you are probably saying to yourself no not ruffles again!!! But, I couldn’t help myself. This cake needed a classic ruffle design. So of course, I chose the easier of the ruffles. Vertical and horizontal ruffles are the easiest of the ruffles to make and they are stunning. With all the hard work involved in making fondant ruffles, the result is well worth the effort.
Tips for Making the Fondant Ruffle Cake
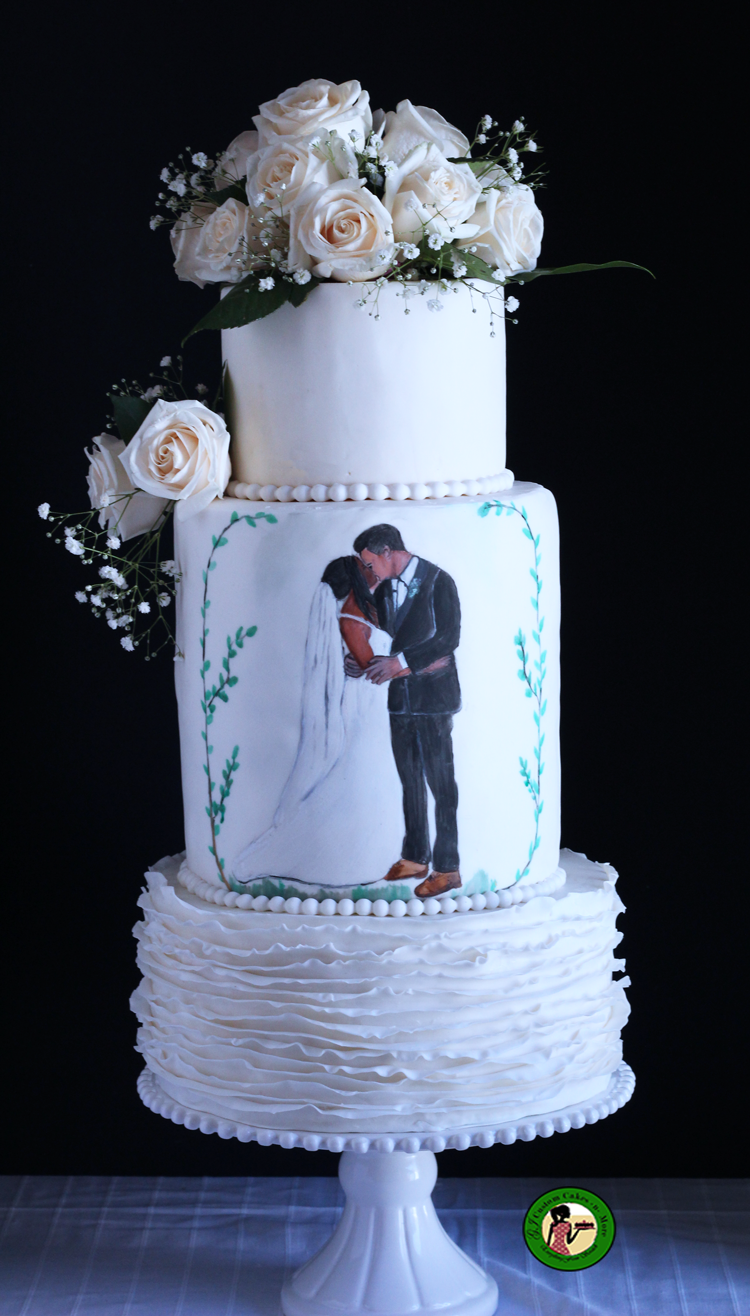
The idea to create this ruffle cake came after the hand-painted tier. After the lovely gravity-defying canvas cake, I have been dying to use my paintbrushes again. So I decided to hand paint this bride and groom and I was so happy with the results. While the hand-painted tier was good by itself, it needed more. The thing with ruffles is you need to plan ahead. They take A LOT of time, but they are so forgiving, you can adjust them any way you like.
The most important thing to remember when making fondant ruffles is to make sure, the ruffles are secured before moving on to the next row. Ruffles are perfect for any type of cakes especially wedding cakes.

This page may contain affiliate links which means that I may earn a small commission if you purchase from any links directed from this website. I only recommend things that I use and the classes I have taken. Wowisthatreallyedible is a participant in the Amazon Services Associate Program. As an affiliate of Amazon, we place custom links in blog posts (such as this one). Thank you very much for your ongoing support.
How to make a Horizontal Fondant Ruffle Cake
Materials Needed:
- Celpad or flower foam pad
- Small rolling pin
- Fondant ball tool
- White Fondant (you can make your own using this marshmallow fondant recipe)
- Gumpaste (I use Satin Ice)
- Tylose Powder (only needed if you are not using gum paste)
- Shortening
- Pasta machine (optional)
- Fondant ribbon cutter
Step by Step Guide: Adding Ruffles to the Side of the Cake
- Cover the cake with fondant using the same color fondant as the ruffles.
- Knead the fondant with tylose powder or with gum paste.
- Roll out the gum paste/fondant mixture about a 1/8 inch thick.
- Then use a ribbon cutter to cut strips of fondant.

- Take a fondant strip and place on a foam pad and use the ball tool to create a ruffled edge. At this point decide where the front of the cake will be and begin adding ruffles to the side of the cake.
- Place a small amount of shortening on the cake and place the first fondant ruffle at the top of the cake.
- Ruffle the edges of the next fondant/gum paste strip and place below the first ruffle. As an option, you may use toothpicks to keep the ruffles from sticking to the row above.
- Keep adding the fondant ruffle below the one above.
- Every once in awhile use the Dresden tool to adjust each ruffle. If the ruffle doesn’t go all the way around the cake, line up the next ruffle to the first one to hide the seam as best as possible. The next row of ruffles will hide the seams as well.
- When you get to the bottom of the cake to place the last ruffle, use the Dresden tool to shape it.


Final cake all put together.
