How to Make Stained Glass Cake
A stained glass cake is such a timeless and beautiful design. I was so excited about this cake project, but struggled with choosing a design. Finally, I settled on a mermaid theme. This cake brought back so many memories of an Art History course I took in Undergrad to study stained glass windows. We spent HOURS studying the different types of stained glass windows. While very boring at times, the best part was a field trip to Paris. These stained glass windows were absolutely breathtaking and beautiful.
As for this cake, I did not want to make it complicated like the stained glass windows I studied. So, I created a freehand design based on the position of the mermaid. I used the technique from my painting on fondant tutorial to trace and transfer the design to the cake.

This page may contain affiliate links which mean that I may earn a small commission if you make a purchase from any links directed from this website. I only recommend things that I use and the classes I have taken. Thank you very much for your ongoing support.
How to make a stained glass cake
There are a few ways to make this cake one way is using piping gel (that’s what I used here), the other using confectioners glaze and finally using royal icing to pipe around the stained glass borders. I opted not to use royal icing and used edible paint instead because it was so much easier. But, you can use whatever you feel comfortable with.
A few things to keep in mind, you need to give the piping gel time to dry before painting on the black. Also, when coloring fondant, start with a really light color. I colored my fondant teal and made it too dark, but you can use white.
To make this cake you are going to need:
- Cake covered with fondant (see the tutorial how to cover a cake with fondant)
- Fondant: white, teal, purple, orange, red (you can make your own fondant see recipe here)
- Teal color gel
- Red color gel
- Green color gel
- Piping gel
- Edible art paint (white and black)
- Paintbrush
- Dresden tool
- Wilton silicone mold, sea life (not an affiliate)
- Graham cracker crumbs
- Small mixing containers
Steps to make the stained glass
The first step in making stained glass cake is to color the piping gel. Use regular gel color to add to the piping gel and place in the microwave for 10-second increments. The piping gel should look like this.

You will have to keep microwaving the piping gel to use.
Test before adding to cake
- I tested on a piece of fondant before I added to fondant. I painted a rose freehand on both pieces of fondant.

- Then added the lines with a Dresden tool.


- I colored in flower first


- Then I chose the colors to add in each section, I only used the colors I had on hand. you really can’t go wrong with this.
- I added the lines and was quite pleased with using the edible colors instead of royal icing.


Now it’s time to add this design to the cake
- Trace the design to wax paper or parchment paper. Add some shortening to the back of the paper and stick on the cake. I added on the four corners. Make sure you flip the design.

- Use a sharp pencil and trace the design onto the cake.

- Use an edible pen and mark in the design. Then use a Dresden tool and add little stained glass or large ones. You can’t go wrong here so have some fun with it.

- Place the piping in the microwave to melt for about 10-seconds and start adding with a paintbrush.

- Add the color on the mermaid first and then the outer stained glass.

- I played around with the colors using what I already mixed. So have fun mixing colors.
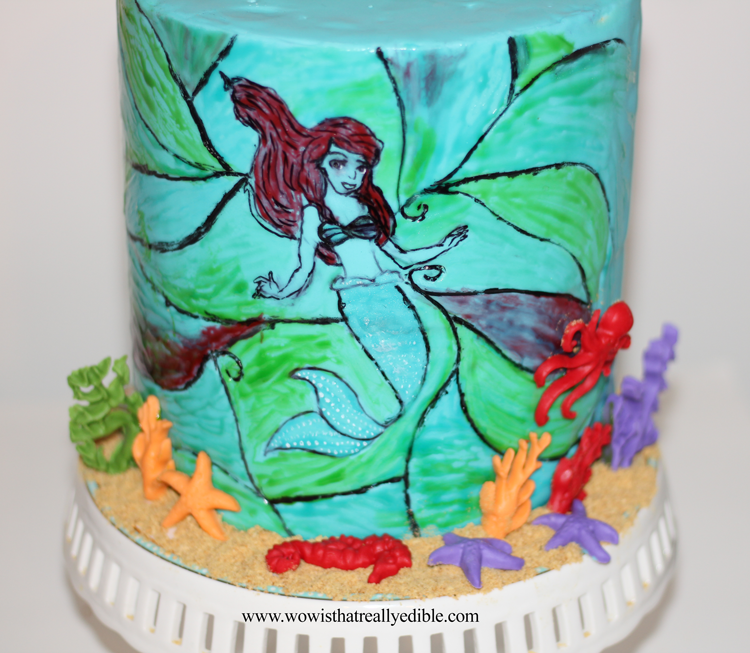
- Of course I had some issues with the face. The lighting was poor so I could barely see and I had to redo her face five thousand times. At some point I had to stop I was making it worse. So here you go the end result.

- Then I moved her to her owncake stand. Added some graham cracker crumbs then some under the sea friends.


- I made them using Wilton undersea mold. Of course when I was done my 6 year old told me some of my corals were not done correctly. But he was very pleased with the design. Well thank you son.
That’s it for the stained glass cake and I am officially embracing the mermaid theme.
If you love this design please share the love. Pin for later.

Related Posts
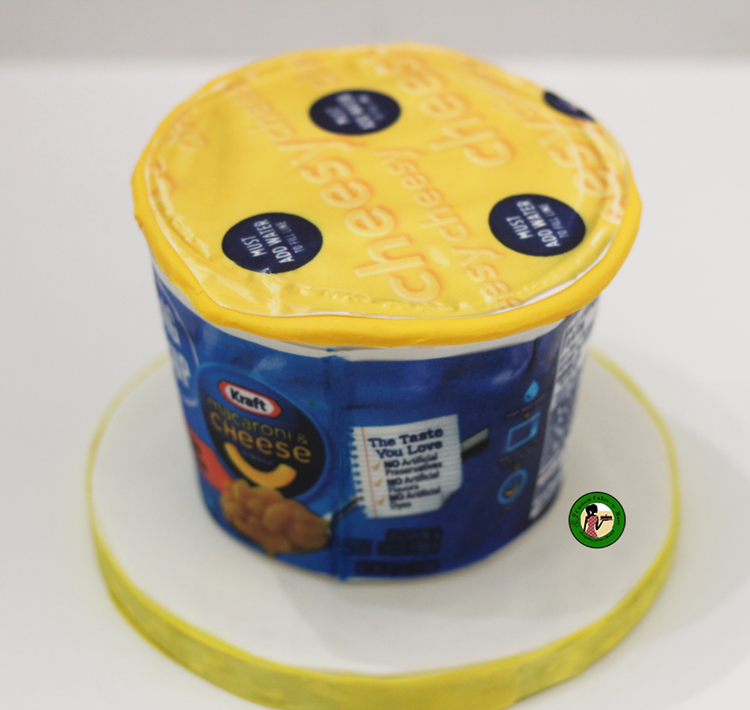
How to Make a Macaroni and Cheese Cake
This week I am switching things up a bit. Today I have a tutorial on
January 24, 2020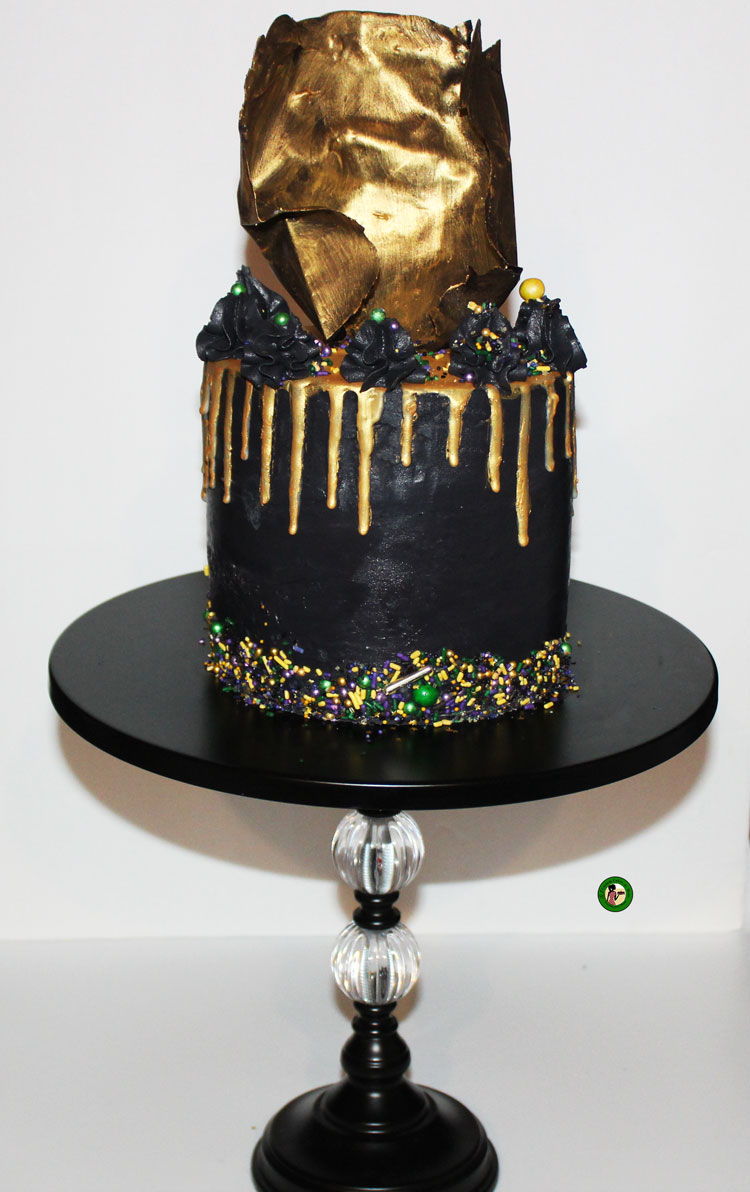
The Ultimate Beginners Guide to Cake Decorating Part III: How to Make a Drip Cake
Welcome to Part III of the Ultimate Beginners Guide to Cake Decorating. In Part I,
February 1, 2019